Swiss Wine: Oeil de Perdrix

The sun has been shining and summer is here so, after previously exploring a couple of the Swiss white and red grapes, I decided it was time for me to sample some Swiss rosé. Oeil de Perdrix is a rosé made from pinot noir. The name means eye of the partridge and is a reference to its pink colour (apparently partridges’ eyes turn pink when they are killed – not the nicest thing to name your wine after!).

While Oeil de Perdrix is now a protected AOC wine (it can only be made in Neuchâtel, Geneva, Vaud or Valais), it actually originated up in the champagne region. Prior to inventing the methode champenoise, the regions attempts at making white wine from red grapes resulted in pale pink wines which were referred to as vin gris or Oeil de Perdrix. When Dom Pérignon later worked out how to make truly white (and sparkly!) wine from the red grapes the Champenoise stopped making Oeil de Perdrix, however somehow the technique travelled to Neuchatel and was adopted there.

These days Oeil de Perdrix is a dry wine made with free run juices and with very little contact between the skin and the juice. While Neuchâtel is it’s spiritual home (it was originally only produced there), the two I tried were from elsewhere in the Swiss Romande: one from Peissy in Geneva and one from Valais.

First up was a 2012 bottle from Les Perrieres, in Peissy Geneva (CHF12)

Les Perrieres Oeil de Perdrix

Les Perrieres Oeil de Perdrix

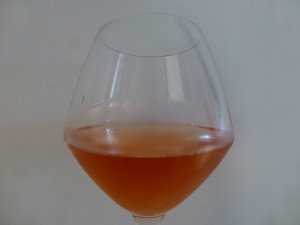
For a rosé wine with very little skin contact (6-12 hours) this was more of an orangey salmon pink than the delicate pale wine I would have expected. It had very few legs (surprising at 13%) and a fruity nose of apricot and apple.

Les Perrieres Oeil de Perdrix in the glass

Les Perrieres Oeil de Perdrix in the glass

This was a very acidic wine which greatly improved with some food. At first there was very little flavour, juts the acidic and a hint of minerarlity, however with food the fruit became more apparent and the wine a little rounder and softer. Not a bad wine, but not something I would want to drink too much of by itself.

The next Oeil de Perdrix I tried was a 2012 bottle from Cave Saint George in Valais (CHF11.95 from Manor) which had won a best of Swiss wines award.

Cave Saint George Oeil de Perdrix

Cave Saint George Oeil de Perdrix

This was an even darker colour than the Geneva bottle, an extremely deep pink. Again, despite being 13% there were no legs to speak of, however there did seem to be the tiniest hint of fizz, a little “spritz” which was interesting. Swirling the glass revealed fresh aromas of peach and citrus.

Cave Saint George Oeil de Perdrix in the glass

Cave Saint George Oeil de Perdrix in the glass

Again this was a very dry acidic wine with a mineral flavour, however it had a fruiter sweeter finish than the Les Perriers bottle making it more suitable for an aperitif. It was quite a rich full wine and worked well with a spicy dish I was enjoying.

These were both very dry and sharp wines and while they were a little too acidic for me by themselves, they were both lovely with food. I’m intrigued by the story and origins of Oeil de Perdrix and I’m going to keep my eye out now for a Neuchâtel bottle to try as well.

Trying new things: Sweet and Savoury Fondants

Recently I have decided that it’s time to expand my cooking repertoire, try some new dishes and learn some new techniques. After flicking through my cookery books and magazines I decided to start with fondants.

Initially I just planned to have a go at the sweet chocolaty versions, but then I thought, what the heck, if I’m trying new things I might as well make a day of it and have a go at the savoury potato type as well and so an extremely calorific meal plan was born.

I started with the savoury fondant, which is essentially a piece of nicely shaped piece of potato poached in butter (and a little stock). I suppose you could really use any shape of potato provided it would cook evenly, but on the TV the chefs always seem to cut perfect cylinders from a large potato and so I thought I’d try that. After a little bit of searching in various supermarkets I eventually managed to locate two sufficiently large firm potatoes to cut my cylinders from .

Cutting out the cylinde

Cutting out the cylinders

This proved to be a lot harder than it looks on the TV. I don’t know if I’m just weak, or if they have sharper cutters than me, but it took an awful lot of huffing and puffing to get through the potato.   Once I did finally manage to cut them out I just lopped of the top and bottom to give it flat ends and then trimmed the edges slightly to make them pretty.

Starting cooking

Starting cooking

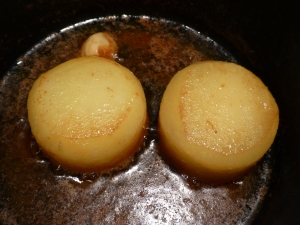
For my two 100g pieces I melted 100g of butter in a saucepan and then added my potatoes. Once they had fried on one side for 5 minutes I flipped them over, added the stock, some thyme and some garlic then turned down the heat and popped the lid on the pan. 25 minutes later a lot of my butter/stock mix was gone (I’m not sure if it evaporated or was absorbed by the potato?) and my fondants were cooked.

Finished cooking

Finished cooking

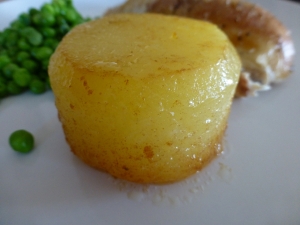
I served these with some roast chicken, peas and gravy. While there were soft, buttery and rich, I have to admit I was a little disappointed. The flavour was very similar to the inside of a good roast potato, but without lovely the crispy outer shell. I can see how these look much more elegant on a plate than a roast potato, but I think at home, where no one is judging my presentation, I would prefer a plain old crunchy roasty!

Potato Fondants

Potato Fondants

I then plunged on with the chocolate fondants. Having watched umpteen series of Masterchef over the years I’ve seen a lot of failed fondants and so I was feeling a little nervous about these. Would they stand up once out of the moulds? Would they have a lovely gooey centre? In the end these turned out to be quite straight forward to make and the answer to both questions was yes!

Chocolate Fondants

Chocolate Fondant

After reading several recipes I was a bit confused as to whether I should chill my fondants or not prior to cooking. In the end, since my recipe made two, I decided to try both methods. While they both worked, the chilled fondant rose a bit less which made it easier to stand up on the plate, so I think this works the best if you have the time.

ready to turn out

Ready to turn out

Unlike the potato fondants, the chocolate ones were not disappointing at all. Instead they were divine – rich and gooey and lovely. As I say, I was surprised how easy it was to make these and I’m definitely going to be whipping up some more in the coming weeks!

Cookbook Review: The I (Italian) Diet, Gino D’Acampo (on Amazon here)

Cookbook Review: The I (Italian) Diet, Gino D’Acampo (on Amazon here)

The I Diet

The I Diet

So this is a diet book that claims to have “100 Healthy Italian Recipes to Help You Lose Weight & Love Food”. Now I already loved food at the time that I bought this book, and I’ve never actually used it to try and lose weight, so I can’t really comment on either of those claims. However I can confirm that there are plenty of healthy Italian recipes inside.

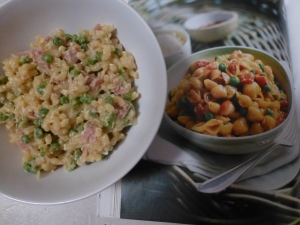
While I haven’t used this book to diet, I have used it on a fairly regular basis in the 4+ years that I have owned it. One dish in particular – the Little Shell Pasta with Peas Ham & Eggs has become my go-to store cupboard meal. This rather strange combination of ham, parmesan, chili, peas, eggs and pasta (chili and cheese!) is an absolute delight that I cook at least once a month. These days I can’t get the little shell pasta shapes so have to use coquillettes instead but that works fine.

The I Diet - Little Shell Pasta with Peas Ham & Eggs

The I Diet – Little Shell Pasta with Peas Ham & Eggs

Now admittedly that dish takes a bit of time to cook and the portion is a tad on the small side, even for a diet book, but the end result is well worth it. A delicious sticky, salty and spicy mix that will never look elegant or sophisticated but always goes down a treat.

So back to the book. There’s a breakfast section, lunch, soups and salads, starters, pastas and risottos, meats, fish and desserts with a couple of “naughty” recipes such as tiramisu and carbonara tucked away at the back.

The recipes are well written and easy to follow and so far I’ve not had a single failure cooking from this book. About 70% of the recipes are accompanied by beautiful photograph. While some dishes take a bit longer or are more involved, most have a fairly limited list of ingredients and can easily be prepared on a work night with no fuss.

As with most cookbooks I own, I’ve used the breakfast and dessert sections the least. However from the desserts I have given the chocolate and chestnut cake a go from (moist and not too sweet at all, this kept well for quite a few days).   On the breakfast front I’ve found that the baked eggs with ham works well as a light lunch or brunch option on weekends when I have a bit more time.

The I Diet - Baked Eggs with Ham in Tomaro & Garlic Sauce

The I Diet – Baked Eggs with Ham in Tomato & Garlic Sauce

While it was the lovely salads that drew me to this book (the Courgette Ribbons with Cannellini Beans with Lemon Dressing and the tuna Three Bean & Tuna Salad with Fresh Mint in particular), the recipes I seem to use the most are the chicken ones. The Rolled Breast of Chicken Stuffed with Mushrooms & Rosemary is a little fiddly to make (I have a lot of trouble getting my rolls to stay rolled, but that could just be me) but produces a tasty and juicy result that looks quite fancy.

The I Diet - Rolled Breast of Chicken Stuffed with Mushrooms & Rosemary

The I Diet – Rolled Breast of Chicken Stuffed with Mushrooms & Rosemary

Another star recipe for me is the extremely quick and easy Chicken with Lemon Butter Sauce. For a sauce that contains only 4 Ingredients this really packs a punch. It’s terrifically fresh and sharp. While chicken (or turkey) is obviously the healthiest option, the sauce also works really well with a nice bit of pork if you’re a bit less diet conscious.

The I Diet - Chicken with Lemon Butter Sauce

The I Diet – Chicken with Lemon Butter Sauce

Finally the Chicken Breast with Parmesan, Tomatoes & Mozzarella is particularly delightful and not something I would consider to be “diet” at all containing, as it does, not one but two cheeses!

The I Diet - Chicken Breast with Parmesan, Tomatoes & Mozzarella

The I Diet – Chicken Breast with Parmesan, Tomatoes & Mozzarella

If you want to use this to diet, rather than to dip into, there are plans consuming either 1500 or 2000 calories a day for those who want to use this book that way. In true Italian style each contains a daily calorie allowance for alcohol. There’s also some useful information on various ingredients such as the fat and calorie comparisons for various Italian cheeses (and of course various alcoholic option) which are worth bearing in mind when creating your own lighter options or just generally watching your weight.


April’s Cheese, Please! – Beef, Beer and Blue Cheese Pie

For the first half of April the weather in my corner of France was spectacular. The skies were blue and the temperature was nudging 20+°C. Spring had definitely sprung and summer looked just around the corner. Unfortunately that has all now changed. Instead the skies are grey, the weather is wet and windy and I’m back in my thick warm jumpers.

Luckily I had finally got around to deciding what I wanted to cook for April’s Cheese, Please! Challenge and had decided on a pie! Perfect to warm, and cheer, me up in this dreadful weather. The theme for this month’s challenge was blue cheese and so the pie I was making was filled with beef, beer and blue cheese.

Beef, Beer and Blue Cheese Pie

Beef, Beer and Blue Cheese Pie

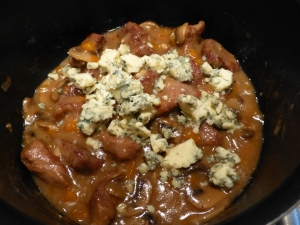
Beef and blue cheese is a classic combination, but one more usually seen in the form of cheese on a burger or a Roquefort sauce with steak. However adding blue cheese to the gravy of a beef pie is another great way to enjoy the pairing. The blue cheese adds a rich salty savouriness to the sauce and really gives it a bit of oomph and depth.

Beef, Beer and Blue Cheese Pie - Adding the blue cheese to the sauce

Beef, Beer and Blue Cheese Pie – Adding the blue cheese to the sauce

After a recent trip back to the UK for Easter I am in possession of two different British blue cheeses: some Stilton and some Blue Shropshire (I also have some Danish blue from IKEA floating around in the fridge but given Fromage Homage’s passion for British cheese I thought I’d better not use that one ;-)).

After a fair bit of umming and ahhing I decided to use the pungent salty Stilton in my pie instead of the slightly creamier Shropshire Blue to make sure I got as much blue cheese flavour in the final dish as possible. If I’m going to add cheese to a dish I want to be able to taste it and enjoy it and I thought the Stilton had the best chance of standing up to the beef and the beer.

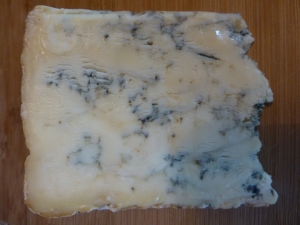
Beef, Beer and Blue Cheese Pie - A nice hunk of Stilton

Beef, Beer and Blue Cheese Pie – A nice hunk of Stilton

When this was cooking you could certainly smell the Stilton as well as the meat and beer. My kitchen was awash with cheesy and beefy aromas and my stomach was rumbling.

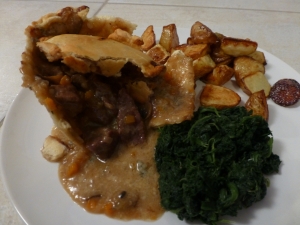
By the time the pie was ready I was starving and unfortunately, in my hurry to consume my creation, I dropped the pie onto the plate and split it open! While I had originally planned to take a photo showing the sauce and the inside of the pie, I had been hoping for a rather more elegant shot!

Beef, Beer and Blue Cheese Pie - Dropped onto the plate!

Beef, Beer and Blue Cheese Pie – “Served” – or rather dropped onto the plate!

Nevermind, you have to break it to eat it and it tasted wonderful! You could definitely taste all the lovely Stilton but at the same time it wasn’t overpowering – you can also taste and enjoy the beef.

For the pastry I made some thyme flavoured shortcrust for a bit of extra flavour and colour, but plain shortcrust (or plain shortcrust and a puff top if you’re fancy) would also be fine. My recipe can be found here.

<div align="center"><a href="http://fromagehomage.wordpress.com/" title="Fromage Homage"><img src="http://i1284.photobucket.com/albums/a562/fromagehomage/Cheesey2_zps85113bab.jpg" alt="Fromage Homage" style="border:none;" /></a></div>

Turkish Food and Tulips

Every year the town of Morges holds a tulip festival for which over 120,000 tulip bulbs are planted in the Parc de L’Independence. The festival runs from April when the tulips start flowering through to the middle of May when the bulbs are dug up and sold off. During the festival there are various weekends with different themes such as a sports weekend and a music weekend.

However the weekend that caught my eye was Istanbul weekend. For the past 5 years Istanbul has donated 10,000 bulbs to Morges for the festival and in return Morges dedicates one weekend of the festival to Turkish food and music. I have no idea how this partnership came about, but it sounded interesting so I popped along to see the tulips and sample the food.

Turkish Flags and Tulips

Turkish Flags and Tulips

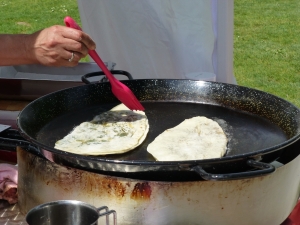
The first thing that I tried was a minced beef Gözleme. These were being prepared to order by two women. One would roll out the dough to a thin circle, rolling it onto and off of a rolling pin to stretch it out. When it was the desired thinness and size she would then fill it and fold it in half. The other lady would then cook it in a large flat pan, brushing the outside with oil to prevent it sticking and turning the Gözleme frequently until the dough was cooked and had puffed up.

Rolling the dough for Gözleme

Rolling the dough for Gözleme

Cooking the Gözleme

Cooking the Gözleme

The result was a moist, fried, half-moon shaped, filled flat bread which was then cut in half to serve. It was a little greasy with both the oil on the outside and the fat from the beef inside, but the bread was wonderfully soft and the filling tasty. I really enjoyed this, if there hadn’t been other dishes I wanted to try I would have given the spinach and the cheese options a go as well!

Beef mince Gözleme

Beef mince Gözleme

The next dish I sampled was a small köfte wrap. This consisted of two large patties made of beef, onions and a lot of parsley accompanied by some salad, more parsley and a generous sprinkling of sumac and dried chilli and all enclosed by some flat bread.

Beef kötfe and salad

Beef kötfe and salad

The patties of beef had been cooked on a BBQ and were tender and ever so slightly pink in the middle which I loved – I’m a big fan of burgers etc which are still pink in the middle. The parsley salad was fresh and the sumac gave everything a zing. This was a really tasty kebab and despite having no sauce added it wasn’t at all dry.

My final destination was the sweets stall. Here are large array of different Turkish desserts were available. I decided to try a selection of different desserts and opted for several different baklava pieces, some Tulumba (a small straight donut in syrup), a rose shaped Şekerpare (pastry in syrup) and another rose shaped pastry dessert which was filled with cooked apple whose name I have forgotten.

Bakalva and tulumba

Bakalva and tulumba

I’d not tried Turkish bakalva before and so I have no idea if these examples were indicative of the general style or not, but I found the pieces all to be a little soft. They had been soaked in so much syrup that there was no crispness left in the filo and even the nuts seemed to provide very little crunch. They weren’t particularly unpleasant, just a little soggy and a bit overly sweet to me. The same goes for the tulumba which was very soft and exceedingly sugary!

Rose shaped Şekerpare and another Turkish dessert

Rose shaped Şekerpare and another Turkish dessert

For me, the two rose shaped desserts were the best. For all its soaking in lemon sugar syrup the Şekerpare was actually not too sweet at all. Towards the center where the syrup hadn’t quite penetrated it was a little dry, but other than that I really enjoyed it. But the dessert whose name I have forgotten was easily the best, the pastry filled with a delicious sticky apple mixture which was both sweet and tart. I wish I knew what it was so I could look it up!

Overall I really enjoyed the food I ate, particularly the two savoury dishes. It was great to not only try some authentic Turkish cuisine but to also be able to watch it being prepared. As for the tulips, they were stunning. There were so many beautiful varieties on display and it was lovely to stroll around the park enjoying them.

Swiss Wine: Gamaret

Gamaret is another modern variety of grape developed by the Swiss in Pully in the 1970’s. It’s known for its deep colour, dark berry fruits on the nose and spiciness. It is often aged in oak which can give it a slightly “burnt” characteristic – one of the best examples of a Gamaret I’ve tried in the past, the Grande Reserve from Chateau du Mont had a wonderful hint of toast about it.

Gamaret’s creator, André Jaquinet, crossed the Gamay and Reichensteiner (an Austrian white grape) varieties with the aim of creating a high yield, early ripening wine similar to a Pinot Noir, but with a good resistance to mildew and parasites. He succeeded and managed to generate not one but two new varieties that are still used in Switzerland today.

Gamaret (or Pully B-13 as it was first known) was originally intended for the French speaking cantons and its sister variety Garanoir (Pully B-28) for the German ones. I can’t comment on the German speaking cantons, but quite often down my end of the country they are both grown and then sold together as a blend with the lighter Garanoir softening the punchier Gamaret. You can also however buy Gamaret (and more occasionally Garanoir) as a single varietal all by itself, which is exactly what I did.

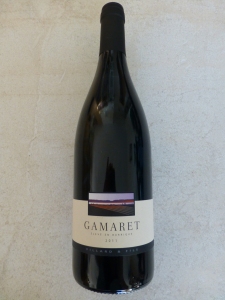
The first bottle I tried for this post was an oak aged 2011 from Villard & Fils in Geneva (CHF20 from Wine Universe at Geneva airport)

Gamaret Villard & Fils

Gamaret Villard & Fils

This was an exceptionally dark purple colour in the glass and had magnificent legs considering it was only 13%. It looked really elegant and beautiful. The nose was full of fresh berries with a hint of the woodiness underneath.

Gamaret Villard & Fils in the glass

Gamaret Villard & Fils in the glass

To drink, this wine was very smooth and refined with only a slight hint of acid and tannins. It was rich and silky and while you could taste the oak a little, it was just a hint and not at all overpowering. There was a fresh and light spiciness on the palate that became much more pronounced when I drank the wine with some food. All in all this was a lovely bottle of wine.

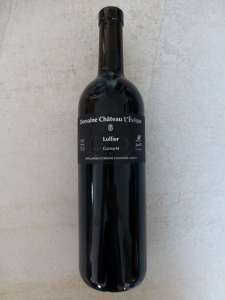
The second bottle was a 2012 from Domaine de Château L’Évêque who are also based in Geneva (CHF15.50 from Coop)

Gamaret from Domaine de Château L’Évêque

Gamaret from Domaine de Château L’Évêque

I was very excited to give this one a go as it had been biodynamically grown and harvested. I have heard a lot about biodynamic wines but before now I’ve not actually been able to give one a try. I was intrigued to see if the effort involved in producing such wines would show through in the glass.

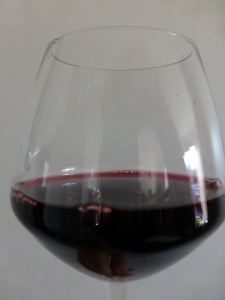
Gamaret from Domaine de Château L’Évêque in the glass

Gamaret from Domaine de Château L’Évêque in the glass

Unfortunately, while this was a perfectly lovely, drinkable wine, it was not the shining example of a Gamaret that I was hoping for. It appeared was very light and thin. The colour seemed much closer to a Gamay or Pinot Noir and there were very few legs despite this wine also being 13%. At first, there was not too much scent either, it took a good vigorous swirl for it to start giving up its aromas.

When they were released, they were not the dark berries I was expecting but instead something more herby and medicinal. There was also a sweet background note which was almost toffeeish (which is “burnt” in a way I guess).

The wine itself had a very subtle spiciness with a plum/damson like finish. Overall it was a very pleasant light wine to drink and I enjoyed it quite a lot, it just tasted nothing like a Gamaret! I don’t know if this had anything to do with it being Biodynamic and reflecting its particular terroir or maybe it was just my particular bottle. I think I’ll have to try and find some more biodynamic wines and experiment!

Enjoying Some White Asparagus

The asparagus season has started and as a result asparagus is currently everywhere on menus and in the markets in both green and white forms. Asparagus is not a vegetable that I have cooked with that often and when I have used it in the past, it’s always been the green version. However the white version is considered something of a delicacy over here on the continent and having never eaten it before I decided now was time to try it out.

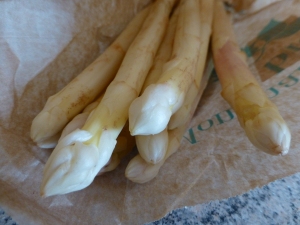
I’d always assumed that the white and green versions of asparagus were different varieties, but the internet has now revealed to me that they are in fact one and the same! To make white asparagus you plant the roots deeper so that the stalk grows underground et voila – white asparagus. The moment the stalks break through the surface you have to dig them up as they will start to turn green once they encounter the sunlight. Any purple tinges on the tips are this start of the colouring process.

White Asparagus

White Asparagus

Revelations on growing methods out of the way, I turned my internet research and attention to what flavours would work well with my asparagus. I’d read that the flavour of the white spears was a bit more subtle than in the green spears and I didn’t want to overpower them. The pairings I found online often contained strong flavours so it seems that the taste of the white version is pretty robust.
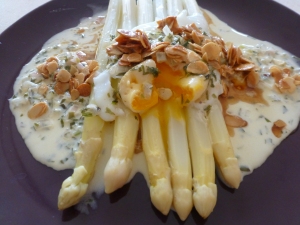
The first dish I made was a light lunch of white asparagus with a poached egg, tarragon sauce and toasted almonds.

White Asparagus with Poached Egg, Tarragon Sauce and Almond

White Asparagus with Poached Egg, Tarragon Sauce and Almond

For this I boiled the asparagus in salted water and topped it with a poached egg, a cream and tarragon sauce and some almond flakes which I had toasted in butter. It was divine! The tarragon worked well with the woody flavour of the white asparagus and didn’t overpower it at all. The toasted almonds gave what was otherwise a fairly soft dish a lovely bit of texture and crunch. This was a really nice spring dish!
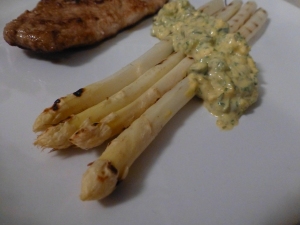
With my remaining spears I decided to make a side dish of grilled white asparagus with gribiche sauce to go with a lovely pork escalope I was frying.

Grilled White Asparagus with Gribiche Sauce

Grilled White Asparagus with Gribiche Sauce

Gribiche sauce is a traditional French oil and egg emulsion with capers, cornichons and lots of herbs, it’s similar to a tartare sauce. While I’m all for making things from scratch when you have the time, this was a week night so I decided to make a cheats version and use pre-made mayonnaise as my base rather than whisk the oil and egg together myself! This meant that the finished result was a little thicker than it should have been, but otherwise it worked fine!

Griddling the asparagus gave a lovely hint of smokiness to it and seemed to enhance the overall richness of its flavour. However while still tender, it was a little chewy compared with the boiled spears.

Even though the flavour of the white asparagus is earthy and subtle, and the texture a little more firm than with the green asparagus, I think both these dishes would also work just as well with the green variety, particularly the gribiche sauce.

Cooking with Wild Garlic

Wild Garlic grows throughout the Spring in damp woodland areas (very often you will find it close to a stream) and will quite often fill the area it’s growing in with a delicious garlic aroma. It’s a fairly easy plant to forage for as that garlic smell is fairly distinctive, especially if you run the leaves between your fingers, but sometimes people do occasionally confuse it for lily of the valley which is poisonous so some care is needed.
If you don’t fancy trying to pick wild garlic yourself you don’t necessarily have to miss out as apparently it’s becoming increasingly common to see it for sale at farmers markets. Wherever you get it from I would recommend giving it a good wash before you use it just in case. You never know what has been roaming in the woodlands!

Wild Garlic Growing

Wild Garlic Growing

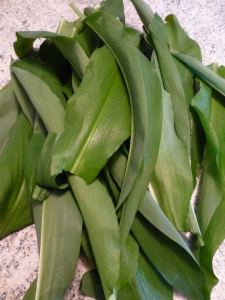
Unlike traditional garlic, people don’t tend to use the bulbs for cooking (although these and the flowers are both edible). Instead they cook with the beautiful smooth green leaves. When raw these can taste ferociously strongly of both garlic and onion, but when cooked, they have a delicate garlic flavour instead and a slightly bitter aftertaste.

Wild Garlic Leaves

Wild Garlic Leaves

Over the last few weeks the wild garlic has started to appear around my area and on the weekend I managed to get out and pick some to cook with. In the end I had enough to make two different recipes.
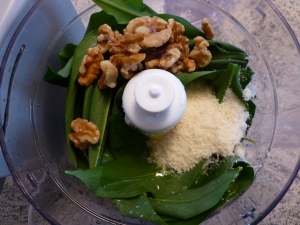
The first was a wild garlic and walnut pesto. For this I combined wild garlic leaves with walnuts, parmesan, lemon juice and olive oil. The pesto was really quick and simple to make, I just chopped everything up together in my food processor until I had a smooth paste which I then used on some pasta.

Wild Garlic and Walnut Pesto - Ready to whizz

Wild Garlic and Walnut Pesto – Ready to whizz

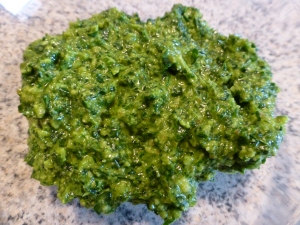
As I mentioned above, the raw leaves pack quite a punch and so this pesto is not for the faint hearted (or anyone off on a date). Combining it with hot pasta which warms it through does take the edge it a little, but this is still a seriously strong pesto. While the garlic flavour is delicious (provided you like garlic) and not at all overwhelming or unpleasant to eat, it will linger on your breath for quite some time. I recommend some mints for dessert after this one!

Wild Garlic and Walnut Pesto

Wild Garlic and Walnut Pesto

The second dish I prepared – wild garlic, mushroom and blue cheese tarts – involves cooking the leaves and so provides a much more breath friendly option.

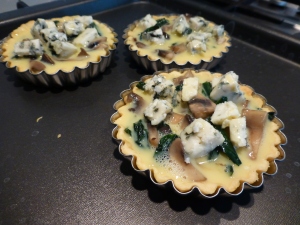
Wild Garlic, Mushroom and Blue Cheese Tarts - Ready for the oven

Wild Garlic, Mushroom and Blue Cheese Tarts – Ready for the oven

For the filling of these tarts I cooked strips of wild garlic leaves together with some small pieces of mushroom. I then topped this with blue cheese and filled the gaps with an egg and milk mix before baking.

Wild Garlic, Mushroom and Blue Cheese Tarts

Wild Garlic, Mushroom and Blue Cheese Tarts

I was hoping to get hold of some wild mushrooms to keep in with the woodland/foraged theme, but I think it may be a little too late in the season as there were none to be found. The plain old closed cup mushrooms I did locate were fine though.
The little tarts had a much more subtle, but still noticeable, garlic flavour, which worked well with the mushrooms and the salty blue cheese. I absolutely loved these tarts, I don’t mean to blow my own trumpet, but they were gorgeous. I ate them with potatoes as a main course, but I think they would also work well as a tasty little starter.

A few easy and tasty lunch options

My work office has a canteen which produces some very nice food, however to eat there every day quickly gets expensive.  Instead, by and large, I prefer to cook my own lunches and take them in (or use up leftovers from my evening meals J).

I usually try to cook options that have plenty of flavour so that they work well either hot or cold.  I also try to go for dishes that, provided I’ve kept them in the fridge, will still be okay towards the end of the week.  I don’t really diet, but do like to try and eat plenty of vegetables and keep things generally healthy at lunch so I can indulge in the evenings if I wish.

Finally I tend to stick to meals which are quick and easy to prepare with not too much washing up.  If I’m going to spend hours creating a dish I want to enjoy it hot and fresh at home on a plate rather than from tupperware in front of my screen at work!

Here are a few of the dishes I’ve cooked over the last month or so.

One of my favourite autumn/winter vegetables is pumpkin.  It’s extremely versatile and has a brilliant ability to take on strong flavours without being overpowered so I end up using it in a lot of different dishes.  A flavour that it pairs particularly well with is chilli and so I recently made some Chilli and Honey Roast Pumpkin and Red Onion Couscous.

Chili and Honey Roast Pumpkin and Red Onion Couscous

Chili and Honey Roast Pumpkin and Red Onion Couscous

This is a really simple dish to cook.  You just need to roast some pumpkin cubes and red onion wedges coated in dried chilli flakes and honey and then combine with some couscous, lemon juice and mint (and some raisins if you like them – I love them in couscous)

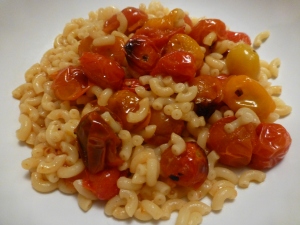
Another simple lunch flavoured with chilli’s is the very healthy and light Roasted Tomato Pasta.

Roasted Tomato Pasta

Roasted Tomato Pasta

This involves roasting some lovely cherry tomatoes in a little oil, garlic, paprika and chilli and then combining roast tomatoes with pasta. The juices from the roasted tomatoes make up the bulk of the sauce so it’s really healthy and if you’re being strict with your calorie intake then the amount of pasta can be reduced accordingly.  This is one of my favourite no fuss lunches and a great way to use up tomatoes that are a bit past their best.

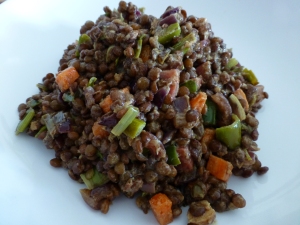
A little more time and a tiny bit more effort goes into my Mustard Lentil Salad, but it’s still a really easy dish to whip up.

Mustard Lentil Salad

Mustard Lentil Salad

Boil the lentils, drain and set aside.  Then sauté carrots, onions and leeks before finally adding some hazelnut saucisson (or just hazelnuts if you’re vegetarian/vegan) and mixing with the lentils, some mustard and some good flavoured oil.  My personal favourite oil for this is pumpkin seed oil.  I love the deep green colour and I adore the flavour even more! I was introduced to it but some friends and now use it on nearly every salad I make.

Finally it’s back to pasta again for Fennel, Lemon and Mascarpone Pasta.

Fennel, lemon and marscapone pasta

Fennel, lemon and marscapone pasta

Another simple option, with this you just gently sauté the fennel with some thyme and garlic until it’s wonderfully soft and them combine it with the pasta and the mascarpone.  When I created  this I needed to use up some mascarpone, but crème fraiche or plain yoghurt would work just as well.

A Day of Pancakes

Last Tuesday was Pancake Day (or Mardi Gras or Shrove Tuesday depending on your preference) and the whole internet (or at least the bits that I looked at) exploded with pictures of people making pancakes.  I had grand plans to join them in this pancake frenzy, but unfortunately I was feeling under the weather and had to give it a miss.

Luckily I was feeling much restored by the weekend and so yesterday, rather late to the party, I had my very own pancake day! Pancakes for both lunch and for dinner, in total three different fillings.

The all-important pancake mix*:

To 70g of plain flour I added 1 medium egg, 100ml of skimmed milk and 50ml of tap water and then whisked the whole lot vigorously.  This produced enough batter for five small (15cm) pancakes.

Pancake batter

The Pancake batter

Before using the batter the first time I rested it in the fridge for 30 minutes.  By the time I used the batter again the second time for my tea, it had separated a bit, but a quick whisk brought it all quickly back together and it seemed fine!

Filling number 1: Savoury

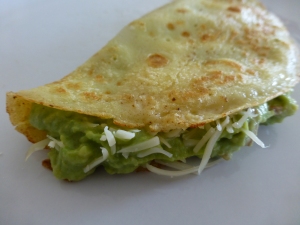
Pancake filled with avocado, bacon and creme fraiche

Pancake filled with avocado, bacon and creme fraiche – more filling than pancake!

So the first filling I went for was my favourite savoury option: avocado, bacon and crème fraiche.  Mash the flesh of one avocado and then mix in 1 tbsp of crème fraiche.  Fry 100g of bacon pieces/lardons/allumnettes (I used allumnettes) until cooked and a little crispy then stir them through the avocado mix.

Pancake filled with avocado, bacon and creme fraiche

Pancake filled with avocado, bacon and creme fraiche, and topped with emmental

To make sure that none of the baconey goodness was wasted I then used the same frying pan (with some melted butter for lubrication) to cook the pancakes.  This mixture would probably be plenty for 2 large pancakes, but since I was in the mood for indulgence I opted to use the whole lot in three (very full!) small ones instead.

I’d also found some grated emmental hiding in the back of my fridge, so sprinkled some of this over the avocado bacon mix to use it up, but I’m not sure it really added much or improved it at all. Plain old bacon, avocado and crème fraiche is pretty great by itself!

Filling number 2: Savoury and Sweet!

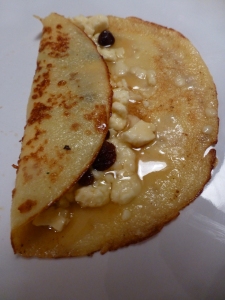
Pancake with caerphilly cheese, raisins and honey

Pancake with caerphilly cheese, raisins and honey

Filling number 2 was a combination of caerphilly cheese (left over from the glamorgan sausages), raisins and honey.  This sweet/savoury combination was inspired by one of my favourite options at the local creperie which pairs goats cheese with apple and raisins.

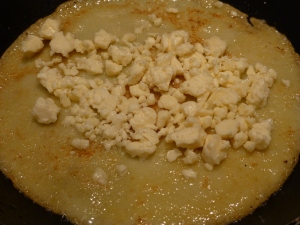
Melting the caerphilly cheese

Melting the caerphilly cheese

For this, once I had flipped** the pancake I turned down the heat, crumbed around 30 – 40g of caerphilly cheese over the top and let it melt for a couple of minutes.  Once sufficiently melted I slid the pancake onto a plate and added a sprinkle of raisins and a good squeeze of honey.  The lemony tang of the caerphilly worked really well with the honey and fruit and overall I was very pleased with this experiment.  One to try again!

Filling number 3: Dessert

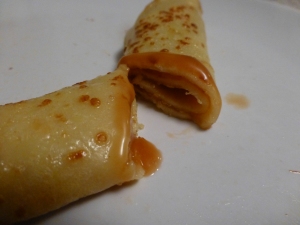
Pancake with creme de caramel

Pancake with creme de caramel

This was the easiest ‘recipe’ of the lot.  I had a jar of Bretange Crème de Caramel au beurre sel sitting in my cupboard waiting to be used and this seemed like the perfect occasion.  I applied it liberally all over the pancake and rolled it up.  It was delicious!

So there you go, two meals, three fillings and five pancakes – my own personal pancake day.  Maybe next year I’ll add in some breakfast pancakes as well.
*Though I have tried many times, I’ve never been very good at making pancakes.  While it’s entirely possible that this recipe is capable of creating deliciously fine and light crepes, I turned out my signature stodgy and heavy pancakes complete with a few lumps.  You may want to source your own recipe!
**No actual “flipping” in the traditional sense occurred, I wimped out and used a spatula!